

Since my Untold Physio Stories Podcast episode with Dr. Bo Babenko, I have been looking more into handheld muscle testing with a dynamometer. Like most of my products, I wanted to figure out a way to test it for less than $800-$1000 dollars, the going rate of most dynamometers.
I built one that works very well, has peak hold (important for a test where the patient holds the contraction for several seconds), and can reset/tare easily.

Step 1 - Get a Crane Scale
- I used this one from amazon
- I removed the bottom hook and replaced it with a carabiner

Step 2 - Attach straps or Mobilization Belt to the Crane Scale
- I used these lashing straps originally, but eventually replaced them with my EDGE Mobility Belt as it was wider and more comfortable to push/pull against)
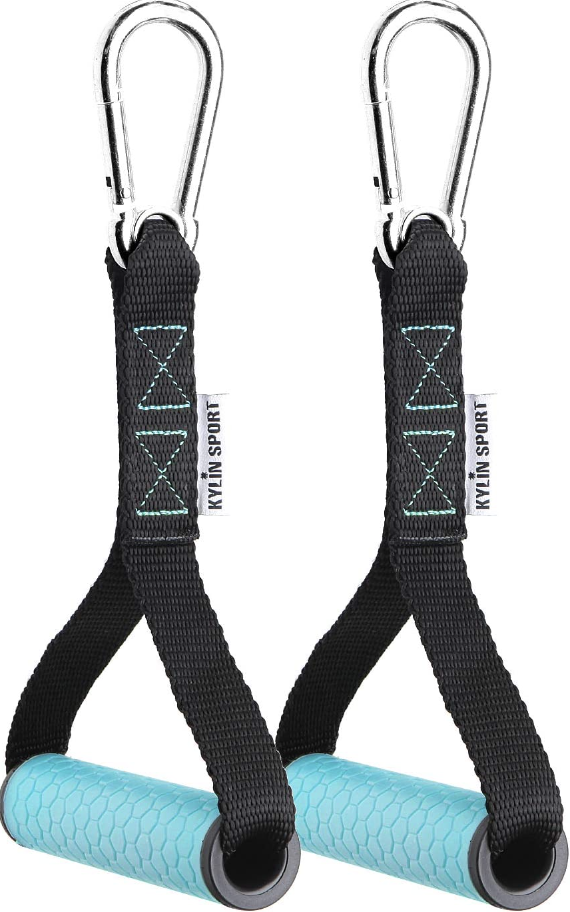
Step 3 - Attach Exercise Handles
- I used these from amazon as they already had carabiners attached to them
- if testing UEs, the patient and PT need to hold on either ends of the device (PT needs to counter the patient's pull) so hands will be attached to the top ring, and bottom carabiner
- if testing LEs, the patient needs to have their LE looped around the lashing strap or mobilization belt and the PT counters with the exercise handle on the bottom of the crane scale

Step 4 - Get Objective with Your Muscle Testing
- I usually have the patient sitting or standing for UE testing
- they can be supine or standing for hip flexion, standing balancing against a table for hip extension, seated for knee extension/flexion, sidelying or standing for hip abduction
- You can also test them in more functional positions that mimic their activity or sport
- One of my favorites is testing trunk SB like a farmer's carry (they pull up with left hand - Crane Scale below, to test R lateral chain)
- Tare the Crane Scale to get it to zero as the pull/weight of the scale/belt needs to be zeroed
- set it to Peak Hold so that the maximum amount of force produced is kept on the screen (otherwise it will go back to zero or the lowest force placed on it after the test is complete)
- Instruct them to meet your resistance and eventually give maximum effort, a good 5-7 second hold should do
- Repeat on both sides, it's suggested that a 10% difference in maximum force produced is significant
- play around with what works best for you and your patients, just be consistent with your cues and testing positions
- make sure both you and the patient are stabilized prior to testing
If this seems like too much of a hassle, check out the Activforce 2 - the modern update to handheld dynamometry and a top seller on EDGE Mobility System!
Want to learn in person? Attend a #manualtherapyparty! Check out our course calendar below!

Learn more online - new online discussion group included!


Want an approach that enhances your existing evaluation and treatment? No commercial model gives you THE answer. You need an approach that blends the modern with the old school.
Keeping it Eclectic...- NEW - Online Discussion Group
- Live cases
- webinars
- lecture
- Live Q&A
- over 600 videos - hundreds of techniques and more!
- Check out MMT Insiders


Post a Comment
Post a Comment